Skip to Main Site Navigation Skip to Content Skip to Footer
Back To Top

Using Photoshop to Resize Photos for Cascade CMS

  1. Download the template size from below.
  2. Click on the desired photo size below to open a Photoshop template. (Ex. 400 x 600 pixels) The file will open in a Photoshop tab.
  3. Go to the File menu to open a photograph you wish to resize; it will open a second tab in Photoshop.
  4. In this tab, click Select > All (Ctrl+A on a PC) and copy it (Ctrl C).
  5. Go to the tab with the template and paste the photo into the space (Ctrl V).
  6. Edit the image by clicking on Edit>Transform
  7. Grab the corners of the image while HOLDING THE SHIFT KEY (so it stays proportional), to size and position the image as you would like. Important: If your image is smaller than the window, that indicates that the resolution is too small to use and you will need to find the original or use a different image. If the image is an original, it is likely going to be huge and it will take repeated steps to size it down.
  8. Once you like the position/crop, Click File > Export > Save for Web (Legacy), choose JPEG (high) and save.

Note: Please name your photo without spacing or use dashes. You may keep the image # for reference, but add a quick description (ex: img123-fall-calendar2019.jpg)
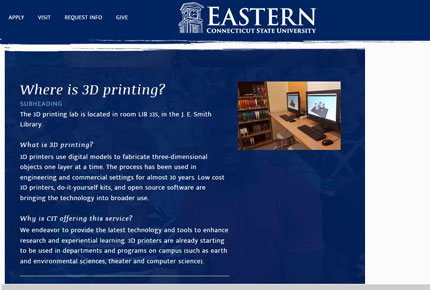
banner landing image sample

Banner Image - Landing

1920x745 pixels Landing Page Banner Image
Interior Banner image

Banner Image - Interior

950x490 pixels Interior Page Banner Image
Card Deck image

Card Deck OR Image Slider

430x290 pixels (card deck shown) Card Deck Image
Image Slider 430x290

Image Slider

425x580 pixels Image Slider 425x580
image slider 3

Image Slider

630x430 Pixels Image Slider 630x430
image slider 2

Image Slider

430x290 Pixels Image Slider 430x290
Gallery

Rollup Image

402x572 pixels Rollup Image
rollup image sample

Gallery OR 2/1 Text/Media

624x425 Pixels (Gallery shown) Gallery Image
2/1 text media

2/1 Text/Media OR Gallery

624x425 Pixels (2/1 Text/Media shown) 2/1 Text Media Image