Skip to Main Site Navigation Skip to Content Skip to Footer
Back To Top

Multimedia Classroom Equipment Operation Guide

For assistance please call HELP Desk @5-4346 or email helpdesk@easternct.edu

General Information

  • Logoff your Eastern account by clicking the windows "Start" button and "Log Off".
  • Please do not shut down or power off the computer.
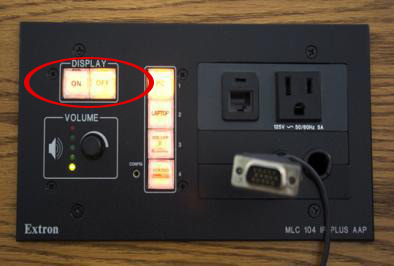
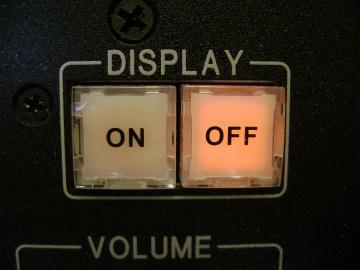
  • Shut off data projector after each use by holding down DISPLAY OFF button
  • Please remove any personal items from consoles.
  • Please do tamper with cable connections in consoles.

LCD Projector

  1. If projector lamp is off, press DISPLAY POWER button on console controller panel.
  2. ON button will flash (approx. 30 seconds) while projector lamp is warming. (During this time you will be locked out
    from making any other selections)
  3. To turn projector off, press OFF button. Projector cooling cycle will take 90 seconds.

Computer (inside lectern)

  1. Press PC power button if indicator light is off
  2. Type your Eastern LOGIN name/password.

DVD/VCR

  • DVD/VCR remote control located in or on console.

Document Camera

* Depending on the year the classroom was equipped, there may be different model ELMO document cameras in them.

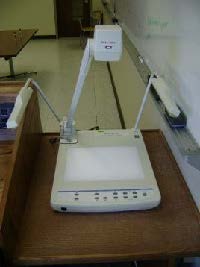
  • Press power on button.
  • Adjust camera armature and lights as necessary.
  • Press ZOOM button to resize image.
  • Press AUTOFOCUS button to focus item.
  • On some models, the ZOOM and FOCUS buttons are also located on the camera body.
  • Press Upper Lights or Lower Lights button to achieve best image quality.
  • On some models there is an Iris control for adjusting brightness of the image.

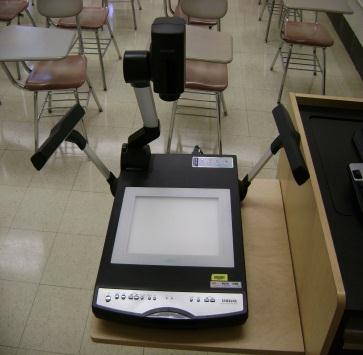
Document Camera - Science Building Labs

  • Press red power button to turn document camera on.
  • For a larger image, position camera head closer to source.
  • Press white Focus buttons on side of camera to focus image.

Source Switcher (computer, document camera, DVD/VCR)

  • Once the "ON" button stops flashing you can select the source you want to project.
  • To switch between sources, press one of the selector buttons on the control panel.
  • Some switchers have a Auto Image" button which should be pressed after connecting a device such as a laptop to the VGA cable.
  • Some switchers have an "AV Mute" button which can be pressed to temporarily "black out" the projector image.
  • If you are playing a DVD in the console's PC rather than the standalone DVD player, be sure that the PC button is
    selected.

Volume Control

  • Turn volume control to adjust video/computer audio volume to speakers.
    * Computer audio volume may also have to be adjusted or unmuted using the Windows operating system volume control.

Laptop Computer Connection

  1. Attach VGA and mini-audio cable located on console to VGA and audio ports of laptop.
  2. Newer consoles also have an HDMI(male) cable for connecting newer laptops, tablets and mobile devices. Some devices will require user provided adaptors for connecting this HDMI cable.
  3. Attach personal network cable to data jack or use network cable provided in the console's cable compartment.
  4. Select LAPTOP or HDMI source button on switcher.